My Old Setup
I have used a DNS based ad blocker for years. I discovered the Pi-Hole project in early 2016 and used it until this year. I even contributed a little to both the main repository and its web interface. Being able to block Ads, Malware and other nasty stuff across my entire network is so handy. Having its own cache means that common queries are super quick and made things feel just a touch faster. I ran Pi-Hole in a Docker container on my Unraid server and it worked flawlessly.
Why I Wanted to Upgrade
While Pi-Hole worked great and I loved it, it still left me wanting more. I wanted DNS over HTTPS (DoH) support and an easy way to sync multiple servers. With standard DNS, your ISP, hackers or others could spy on you through your DNS requests. By doing them over HTTPS, you can remove this risk. I wanted multiple servers because every time I take my Unraid server down for maintenance, I lose DNS completely.
Installing Adguard-Home
Installing AdGuard-Home is super easy. There are setup instructions on their github repo for different operating systems. Link. I setup my primary instance on my Unraid server , and a secondary instance on a Nano Pi 2 I had lying around from an older project. I configured DNS over HTTPS using Cloudflare and Quad9s. I didn’t configure the second server at all, the sync will handle that for me.
Syncing Multiple AdGuard-Home Instances
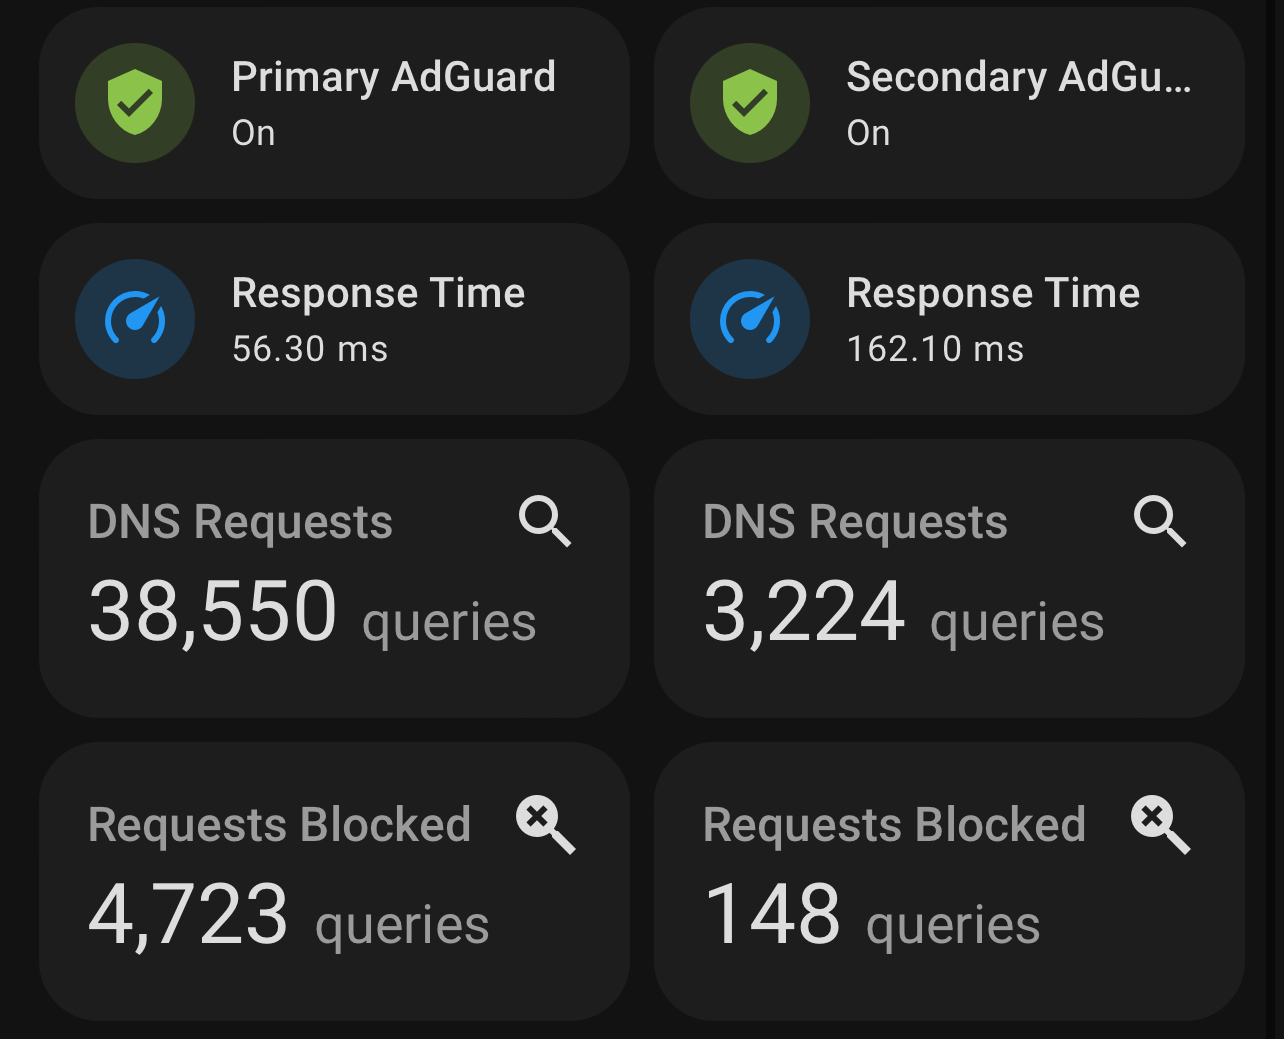
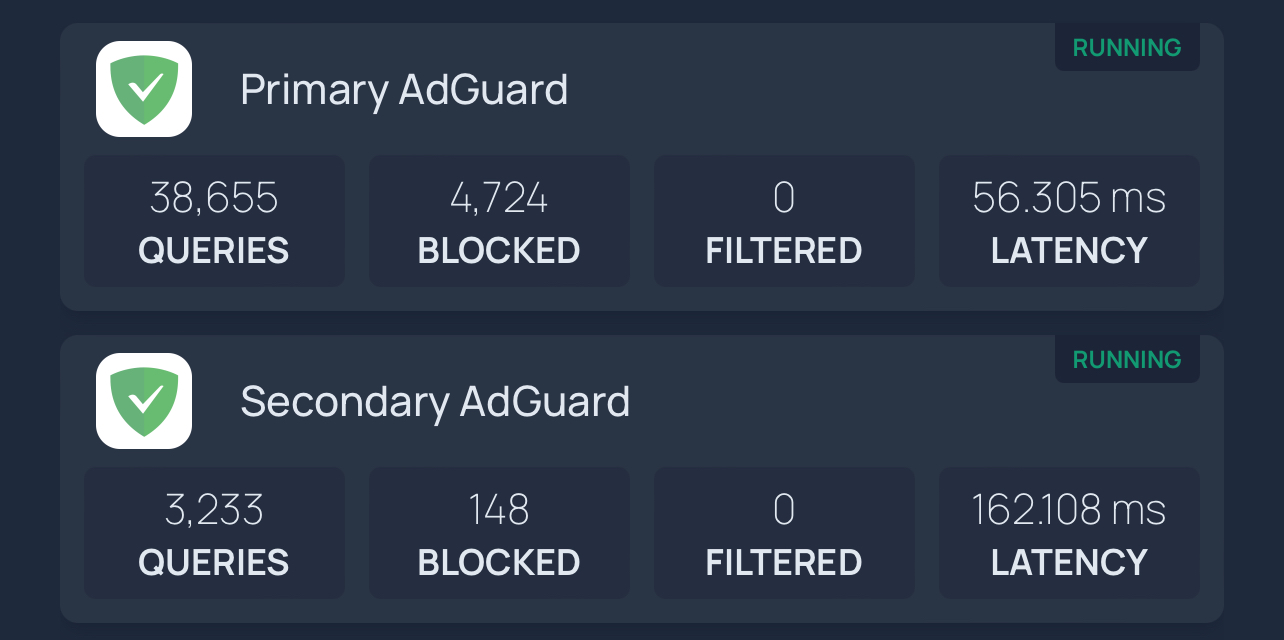
AdGuardhome-Sync makes synchronizing multiple servers effortless. I setup the docker container on my Unraid server, modified the config with my instance info and ran it. It automatically synced literaly every setting from my primary server to the secondary one. I told my router to use those servers for DNS in my DHCP settings and that was it! Added it to my personal dashboard and Home Assistant to monitor them.
Screenshots