Introduction
I had someone reach out with a request. They needed to move thousands of pictures and movies from a business Dropbox account to a Google Drive account. They thought they would have to do this manually, item by item, and asked if I had any faster solutions. I used Rclone in the past for my Plex server and knew it could easily accomplish this task.
The Plan
All of the data we are working with is in the cloud, so we will use a cloud server for this. Utilizing its fast internet connection, we can move the data very quickly. I use Digital Ocean for all of my other cloud computing, so they were an easy choice for this. Their servers charge by the hour, so we will plan as much as possible in advance to keep costs low. Digital ocean’s “Premium CPU” droplets have a 10 Gbps connection, while the rest have 2, so we will be using one of them to maximize speed.
Setting Up Rclone
Configuring Rclone ahead of time will save us computing costs. Download Rclone and install it. This guide uses Ubuntu hosts but the same commands should work on WSL or Windows. After its installed run rclone config and connect your clouds. Rclone calls each of these connections a remote. Setup instructions vary wildly depending on cloud, the Rclone website is great for this..
In our example our remotes are called drop for Dropbox and drive for Google Drive. A normal command for Rclone is rclone COMMAND remote:path so for example rclone lsd drive:Pics. You will need to access the rclone.conf file located at ~/.config/rclone/rclone.conf, this file will be transferred to our cloud server.
While here, check the size of the data you will be moving. We will be moving the Pics folder from our drop:/ remote, so my command to check size will be rclone size drop:/Pics. We will use this information to make sure we transferred everything.

Note On Dropbox Work Boxes
For Dropbox specifically, just remote: accesses your personal Dropbox. If you have a business one as well, you need to add a / as well. So for us to access the work Dropbox, we type drop:/.
Creating the VM
I used Ubuntu for this. Create your VM, I did Ubuntu Server 24.04 LTS, with 4 Premium AMD cores and 8GB of RAM. Premium AMD for the faster network speeds. Once its live, login and install rclone. wget the 64 bit .deb from the downloads page, and install with dpkg -i rclone_package_name, tab is your friend. Once its installed, copy your rclone.conf file from earlier to ~/.config/rclone/rclone.conf.
Transferring Data
I recommend doing this in a screen session so you don’t have to leave the terminal open for the entire transfer. For my specific use, the Rclone command I used was:
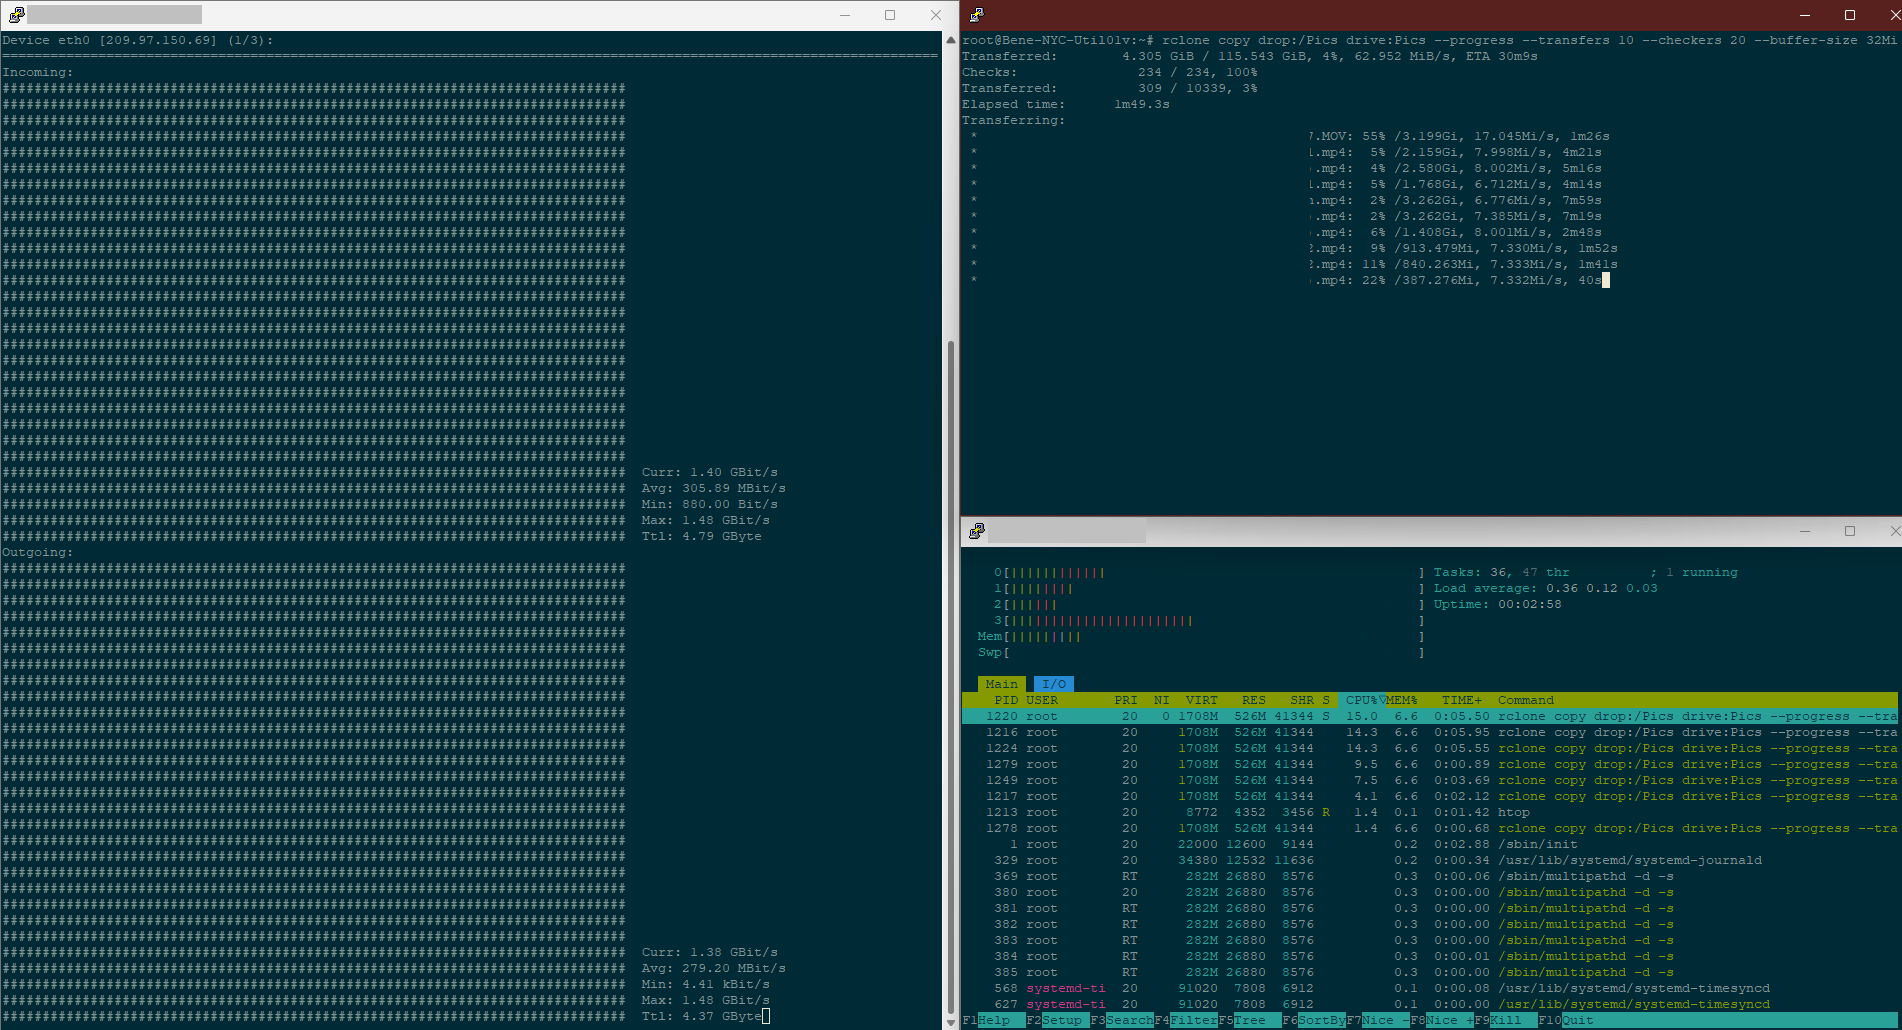
rclone copy drop:/Pics drive:Pics --progress --transfers 10 --checkers 20 --buffer-size 32Mi.
- We included the
/in the Dropbox remote to ensure we are using the Work Box --progressto show us progress during the transfer--transfers 10increases the number of simultaneous transfers to better utilize the fast hardware we are running on--checkers 20works with the above flag, does best when it is 2x whatever transfers is--buffer-size 32MiI am unsure if this did much, but the server had a lot of RAM so I wanted to make sure Rclone used as much as it wanted.
With these settings, I got some impressive transfer speeds, 1.4 Gbps upload and download, simultaneously. I did not get a screenshot of it, but the 124GB of data transferred in 1 hour and 13 minutes.

After the transfer completes, check the size in the destination to make sure it matches. It does!

Closing Notes
This worked very well, and was easy to execute. If this becomes a regular thing, I will probably make an Ansible Playbook for it to speed up execution even more.

