Introduction
If you record gameplay clips or stream, you might want to limit what gets broadcast or saved. In a standard setup, all sounds go to one audio device and everything is recorded in one audio track. With some lightweight software, we can split up our audio and gain a lot of control over it. With this setup, we can prevent discord voice calls, or music, from being recorded or streamed. We can also stream music, but to a different audio track so it isn’t included in Twitch VODs. Instructions are specific to Windows 10/11 but will work for all current versions of windows.
Software Links
The software we need is lightweight and be downloaded here:
- Voicemeeter
- VB-Cable
- Voicemeeter-Windows-Volume Optional, more info on this in a later section
Default Layout
Throughout this guide we will be talking about routing audio. Knowing how a default setup looks will help us understand the changes we make. As stated in the introduction, by default, all audio is sent to one audio track and it’s all audio or nothing. Displayed as a flowchart, it looks like this:
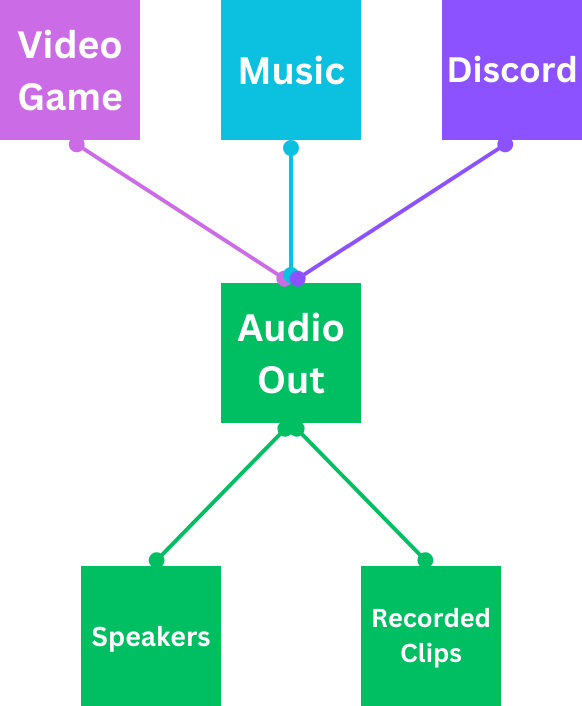
As stated above, we are stuck with one audio track and everything is recorded everywhere. Not optimal and not flexible.
Voicemeeter Setup
Install Voicemeeter and VB-Cable now. Restart your PC after installing the software for the first time. Now we need to change some settings.
Setting Default Sound Devices
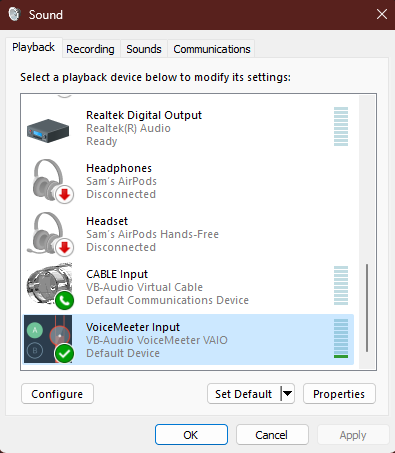
Right Click the Speaker Icon at the bottom right of your screen, and click Sound Settings. Scroll to the bottom of the window that pops up and click More Sound Settings.
On the Playback tab, right click on VoiceMeeter Input and click Set Default Device. Right Click on CABLE Input and click Set Default Communication Device. It should look like this when you are done.
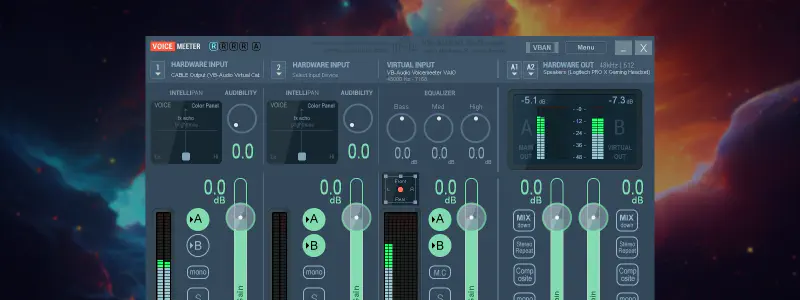
Configuring Voicemeeter
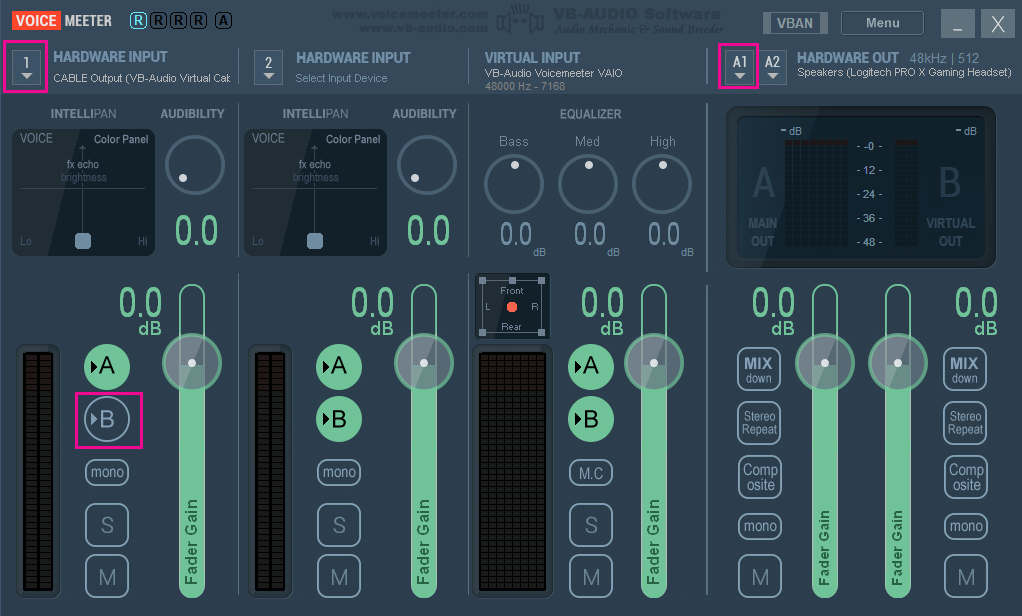
Open Voicemeeter. On the left where it says 1 Hardware Input, click the 1 and select WDM: CABLE Output (VB-Audio Virtual Cable). Further down this section you will see Highlighted A & B Buttons. Click on B so it is no longer highlighted. On the right most section, where it says A1 A2 HARDWARE OUT, click on A1 and select the WDM entry for your speakers or headset, for me it was WDM - Speakers (Logitech PRO X Gaming Headset).
Note about Volume
With this setup, changing the volume with Windows no longer does anything. You have to use the Bar on the right most column, the left of the 2. If you have a hardware volume slider on your headset or speakers, this shouldn’t be a problem. If you need Windows to be able to control volume, like if your using earbuds, you can with the third download listed above. Installing that third program and starting it with Windows will link Windows and Voicemeeter volume.
Improved Layout
With the changes we made, our audio flowchart now looks very different. We are going to break it down, level by level.

- At the top we have our Audio sources, nothing has changed here yet.
- In the middle our Audio out has been renamed to VAIO and Cable Output. These are also the names of the devices we set as defaults in our Windows sound settings. If you notice, no audio is going to the Cable Output yet, we will fix that below.
VAIOis our default sound device and were most of our audio will go. In Voicemeeter it is listed as Virtual Input at the top and it is the section that has the equalizer.Cable Outputis where we will send audio we don’t want in our gameplay clips or Twitch VODs. It is colored red for clarity.
- The bottom section has gotten an additional label. In Voicemeeter, on the right side of the window you will see
A Main OutandB Virtual Out. Main out is our hardware device like speakers or headset, Virtual out is our recorded clips. If you notice, everything that we send to Cable Output will only be sent to our headset/speakers, not to our recorded clips.
Routing Audio
Now that we have a second audio device and have it setup, we can set applications to use it.
Discord
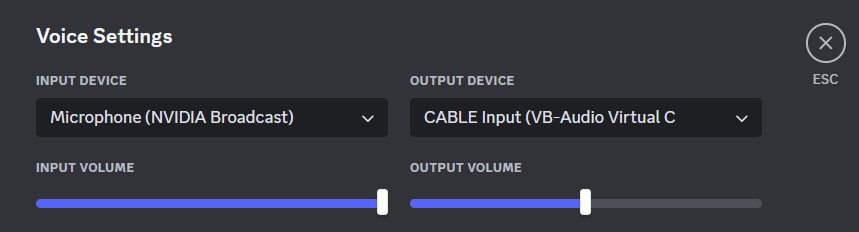
Discord is really easy. In Discord, click the User Settings Gear at the bottom left of the window. Click Voice & Video in the list on the left. Click the Dropdown under Output Device and select Cable Input (VB-Audio Virtual Cable)
OBS
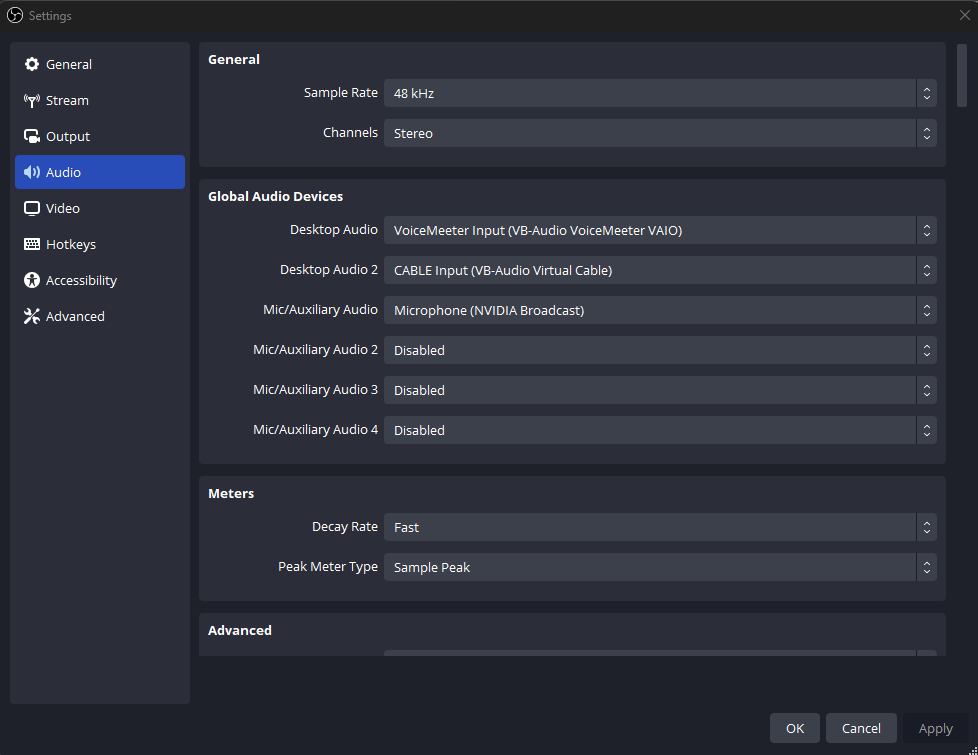
OBS requires some special setup to fully take advantage of what we have done. Open OBS and then click File > Settings at the top of the window. Click Audio on the left. In the section labeled Global Audio Devices set the devices as follows and click OK when done:
- Desktop Audio set to
VoiceMeeter Input (VB-Audio VoiceMeeter VAIO) - Desktop Audio 2 set to
CABLE Input (VB-Audio Virtual Cable) - Mic/Auxiliary Audio set to your Microphone
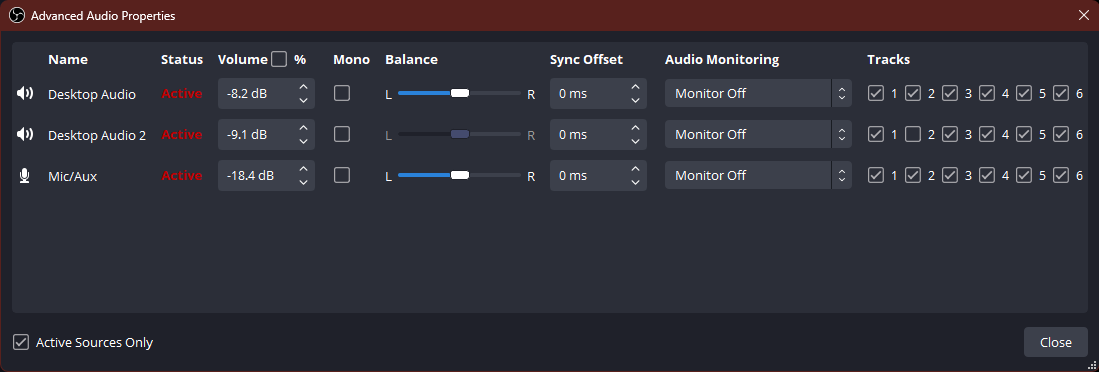
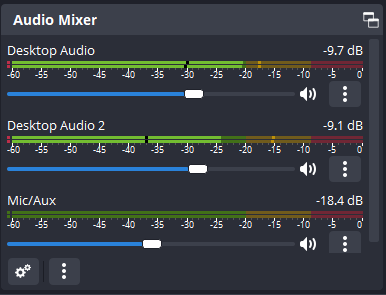
Back in the main window of OBS, click the 2 Gears in the Audio Mixer section. On the Desktop Audio 2 row, uncheck Track 2 on the right. This will prevent this channel from being included in Twitch VODs.
Using the Audio Mixer section you can now independently adjust the volume of each audio device!
Most Other Applications
For applications that do not let you set audio output devices, we can use the Windows Volume Mixer. Right click your Speaker Icon bottom right of your screen and click Open Volume Mixer. Click on the Application you do not want included in your clips. Set the Output device to Cable Input (VB-Audio Virtual Cable).

Final Layout
After doing all of the above, our final audio layout looks like this:
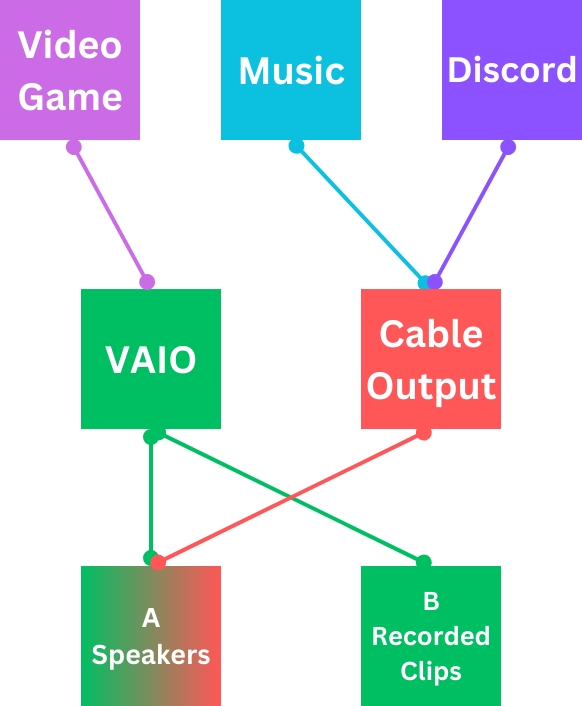
Our Music and Discord audio is all sent to our Cable Output only, so they are not recorded in our clips.
Notes
I have used this setup for a couple of years now. It works very well for me and ensures that I can grab a clip at any time with Nvidia Instant Replay. I know the clip will just have gameplay audio and nothing else! The one issue I have found involves USB soundcards.
If your headset or speakers uses a USB soundcard, it can lead to awful, jumbled sound in some cases. For me this is mostly when my computer wakes back up from sleep. To fix it, right click the Voicemeeter icon in your system tray and click Restart Audio Engine.
It can be prevented by giving the process audiodg.exe High Priority and setting Affinity to one core. The Voicemeeter-Windows-Volume app linked above includes this fix as an option.